Install WordPress
The first way to install WordPress is the automatic method. In other words, you don’t have to do anything, we take care of everything 😉
The second method to install WordPress that we are going to show you is the manual method. It implies that you have access to the FTP of your server and phpMyAdmin.
Table of content
Install WordPress automatically
1. Select Softaculous
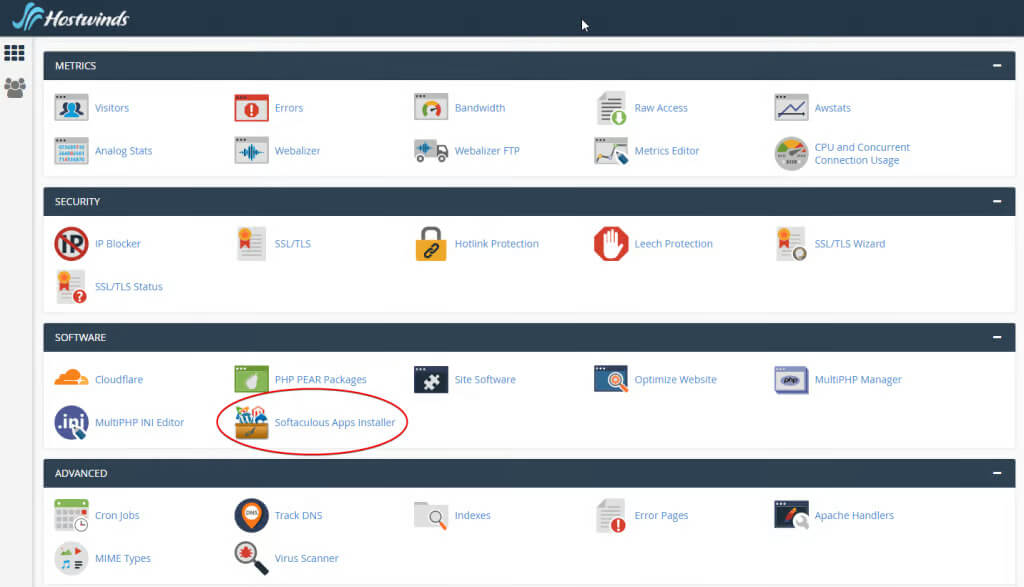
Login to your CPanel account and click on Softaculous in the Software section.
2. Select WordPress
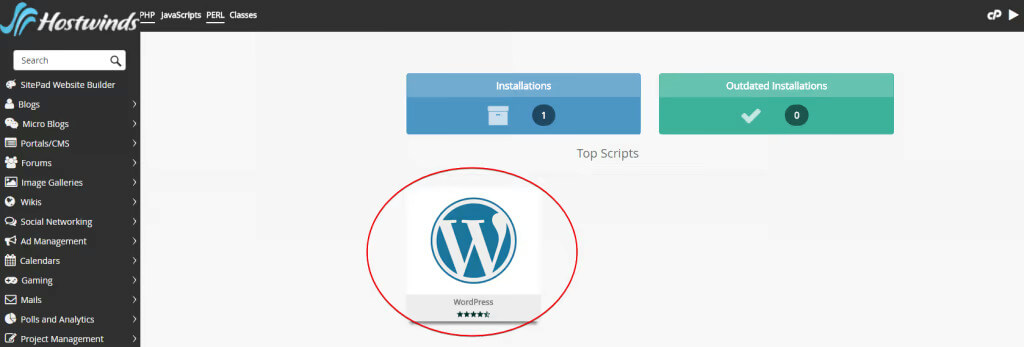
On the next page, under Top Scripts, click WordPress.
3. Install WordPress
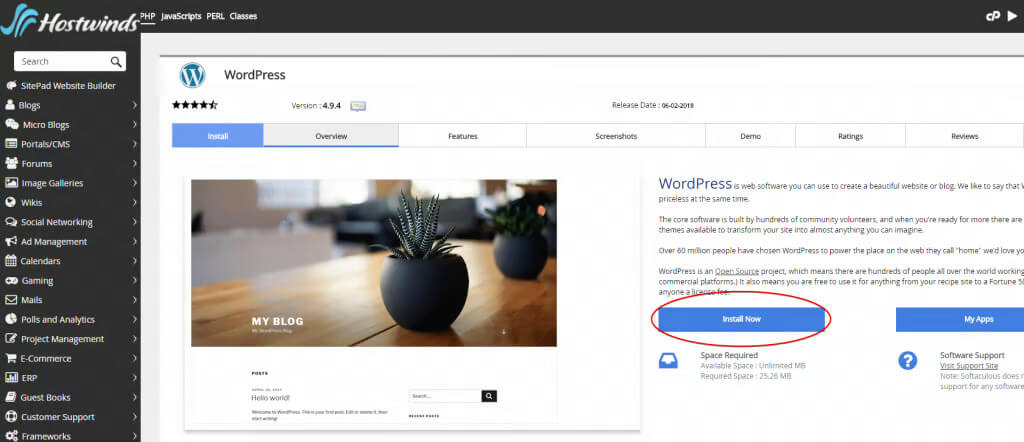
On the next page, click “Install Now”.
4. Setup your WordPress
Next, you will need to fill out the required fields to ensure your installation goes exactly as you want. Once all fields are filled out, click the “Install” button and it’s done 🙂
Install WordPress manually
Download WordPress zip file
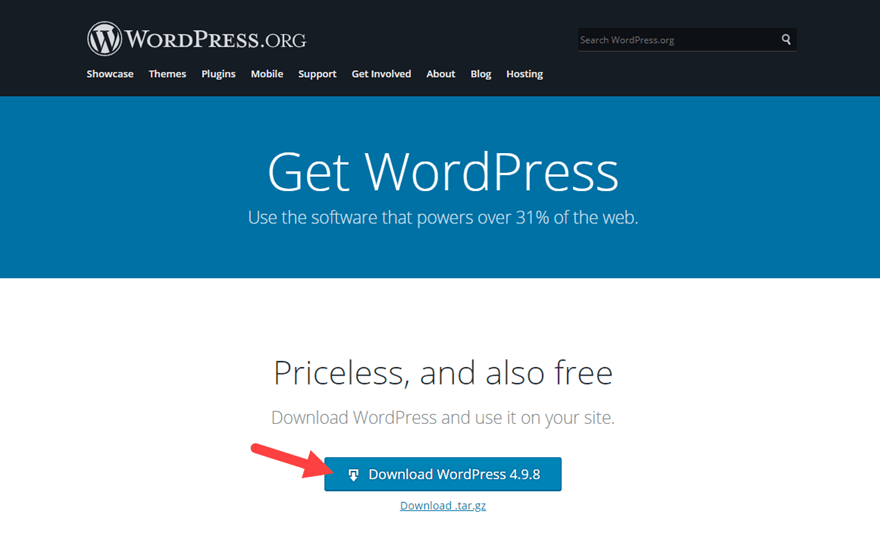
First, you have to download the latest version of WordPress on WordPress.org
Now WordPress zip file is download to your computer. Go ahead and unzip (extract) the files so they will be ready.
Create a database
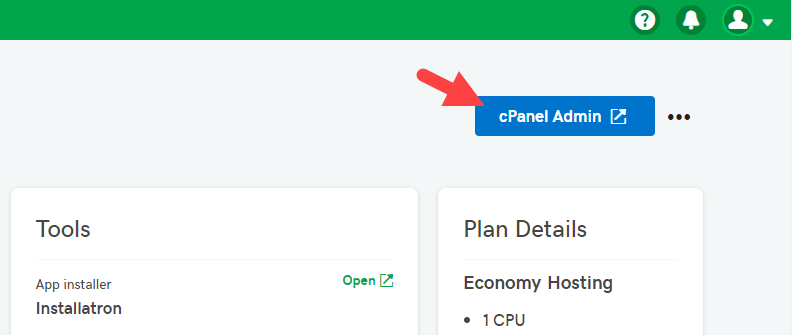
Before adding WordPress to your web server, you must first create a database to store those WordPress files. To do this, login to your hosting account and launch Cpanel.
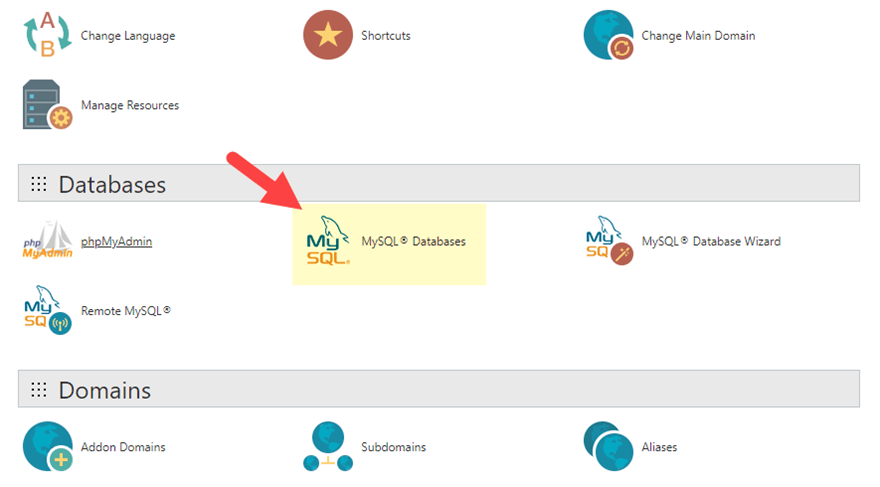
From the cPanel dashboard, open MySQL Databases (it should be under the Databases category).
There you need to do 3 main things:
- Create a New Database
- Create a New User for you Database
- Add the User to the Database
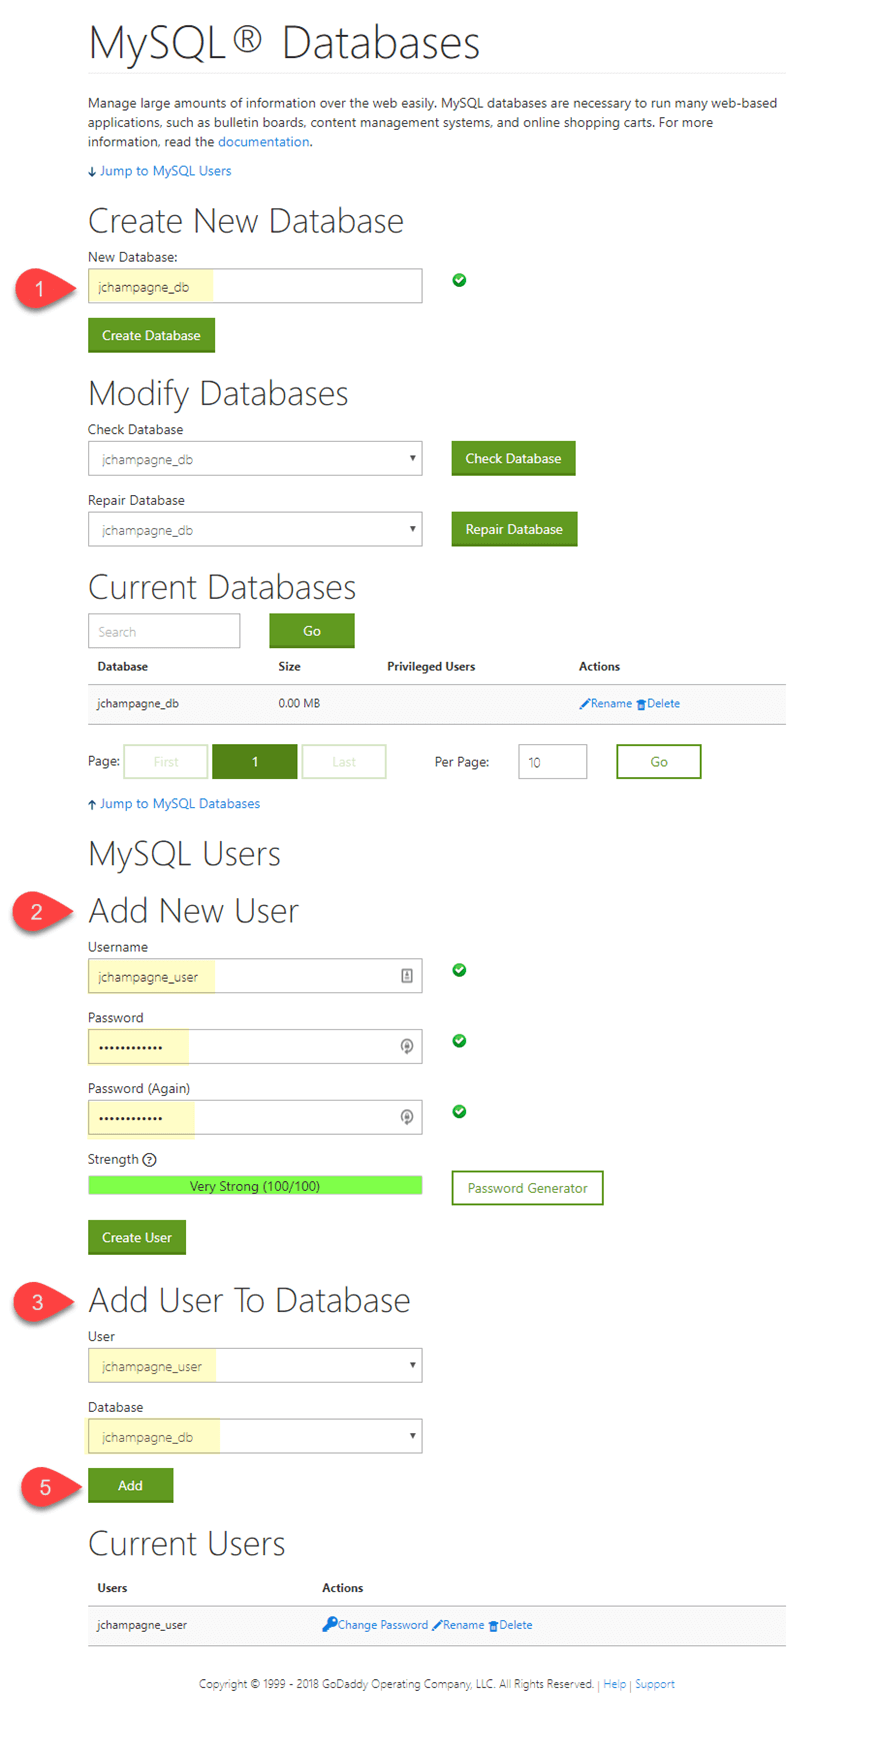
You will need to remember this information (database, username, password) when setting up your WordPress Installation you may need to save it somewhere temporarily.
Now you are ready to transfer your WordPress files over to your site.
Upload WordPress files
Accessing your site’s directory on your web server will require using an FTP client or accessing the directory using the file directory via cPanel.
Method 1: Uploading the Files with FTP (FileZilla)
To access your web server root directory using FTP, You will need an FTP client like (FileZilla, Cyberduck, or Transmit). Feel free to find the best FTP client for your needs. For this illustration, I’m using FileZilla.
Open FileZilla and enter the FTP credentials provided by your hosting provider. This includes the Hostname (the address to the server), Username, Password, and Port (leaving the port blank will work fine in most cases). In some cases you will need to create a new FTP user on your hosting site so that you will will have a username and password to login to the server.
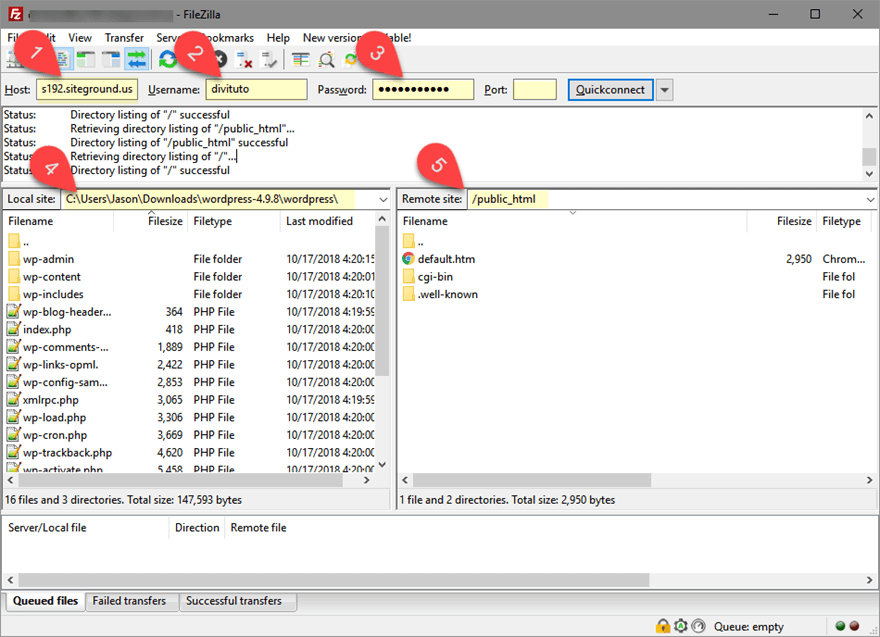
Select all the the WordPress files from the left and drag them over to the public_html directory on the right.
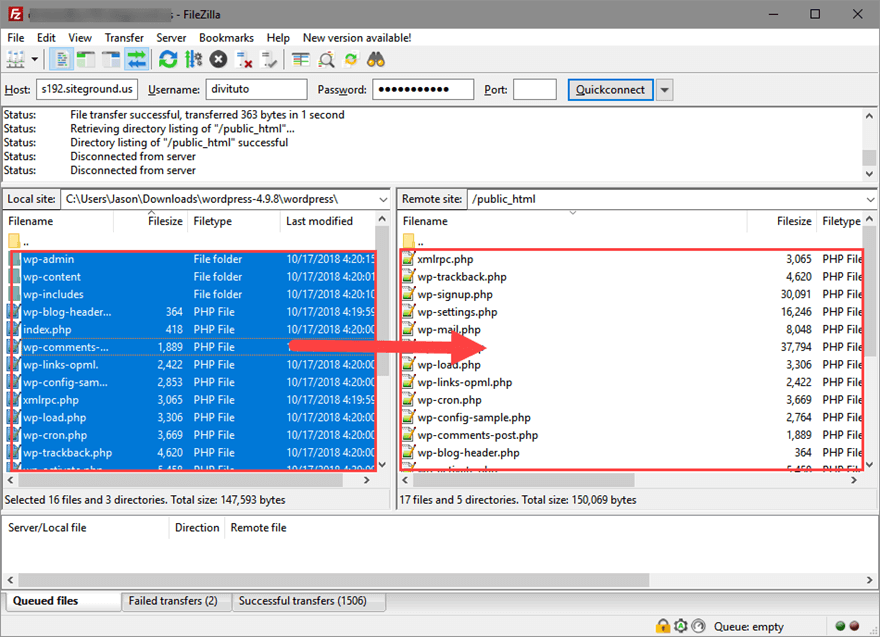
This may take a few minutes to complete. But after the transfer is complete, you are ready to run the WordPress installation by accessing directly to your site URL.
Run the WordPress installer
Now that you have the WordPress files loaded on your host server at the correct directory, it’s time to run the famous five-minute WordPress installation process. To start the WordPress installer, simply navigate to your site from your web browser. So, if you have WordPress at the root, go to www.yoursite.com.
The first step allows you to select a language. Once you select your language, click continue.

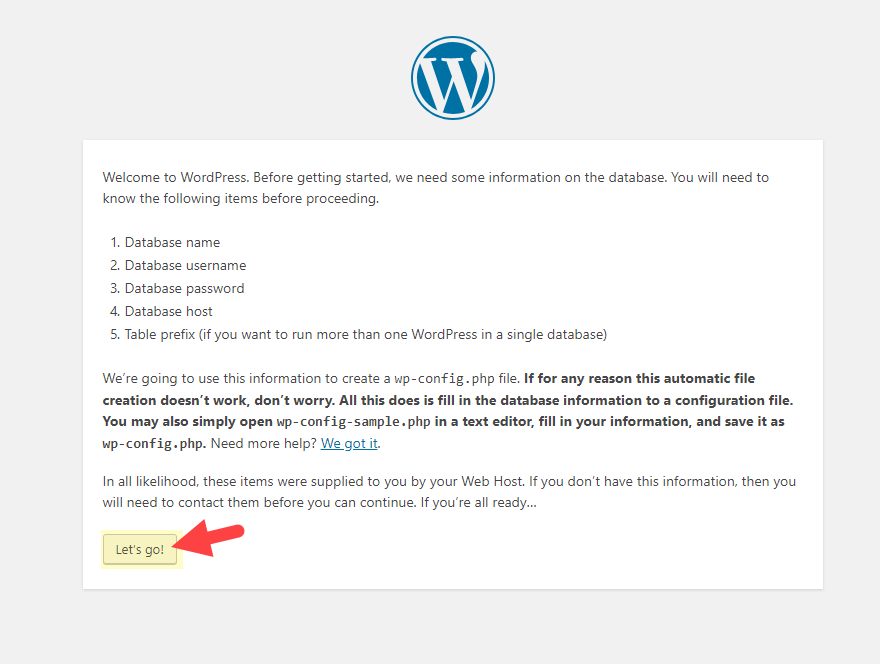
Next, you will be prompted to get your get your database credentials which were created in step 2 above.
When ready, click “Let’s Go”.
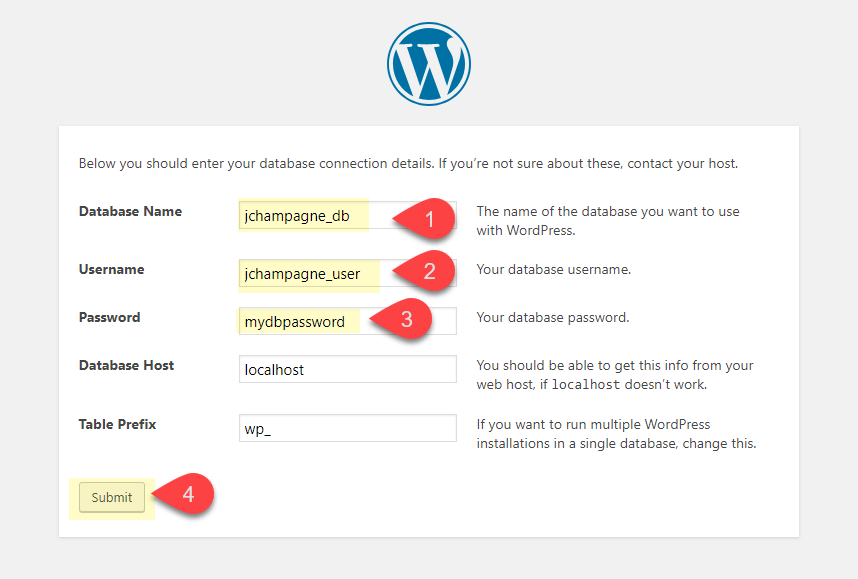
Enter the Database Name, Database User, and Database Password you created in step 2. You can leave the Database Host as “localhost” and the Table Prefix as “wp_” unless you have a unique setup in mind. Then click Submit.
Now run the installation.

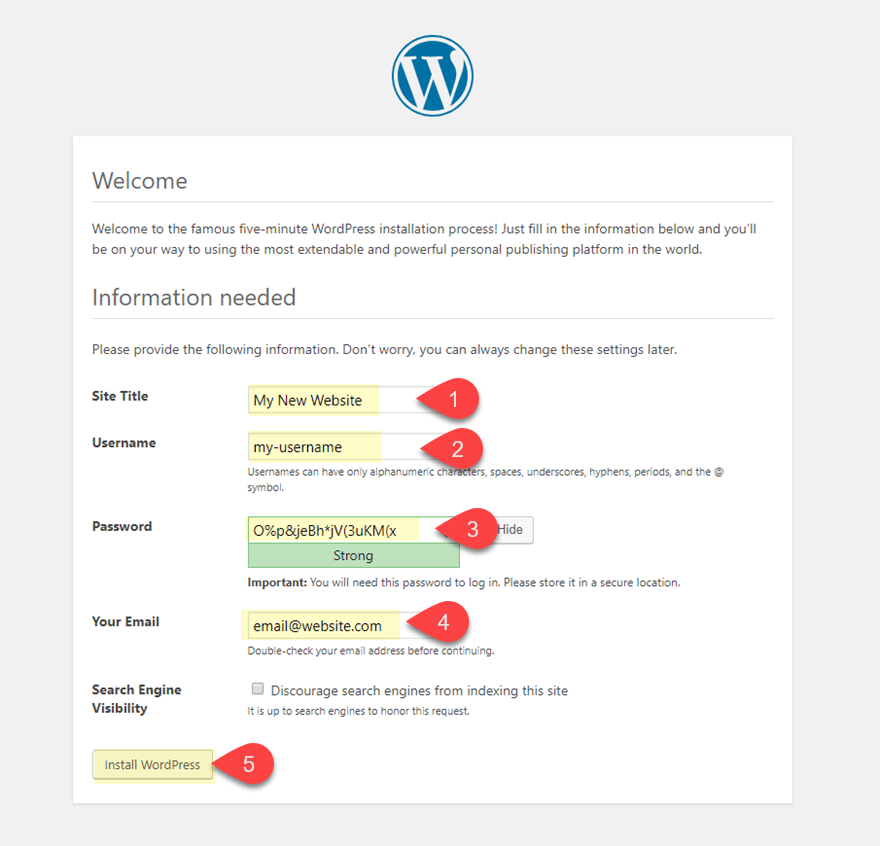
For this last step, enter the information needed for your new WordPress website. This includes the Site Title, the admin username and password to access the backend of your site, and the admin email address. Don’t worry, you can always change this later within the WordPress dashboard after WordPress is installed. Once done, click Submit.
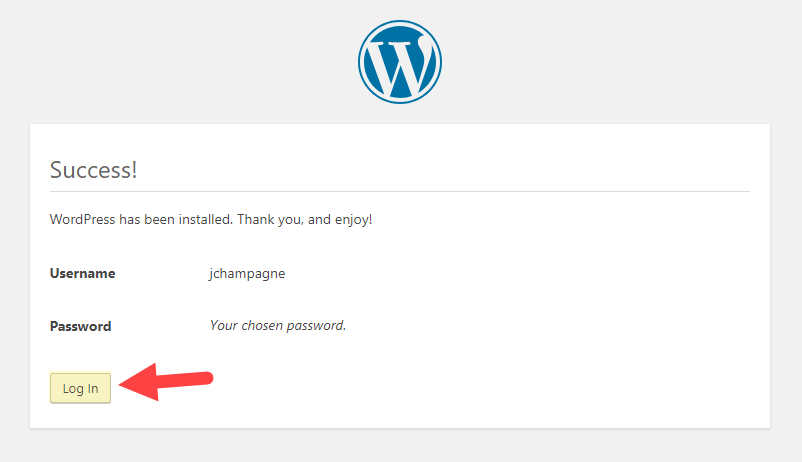
You will be greeted with a nice message telling you that the installation was a success! Click the Login button.
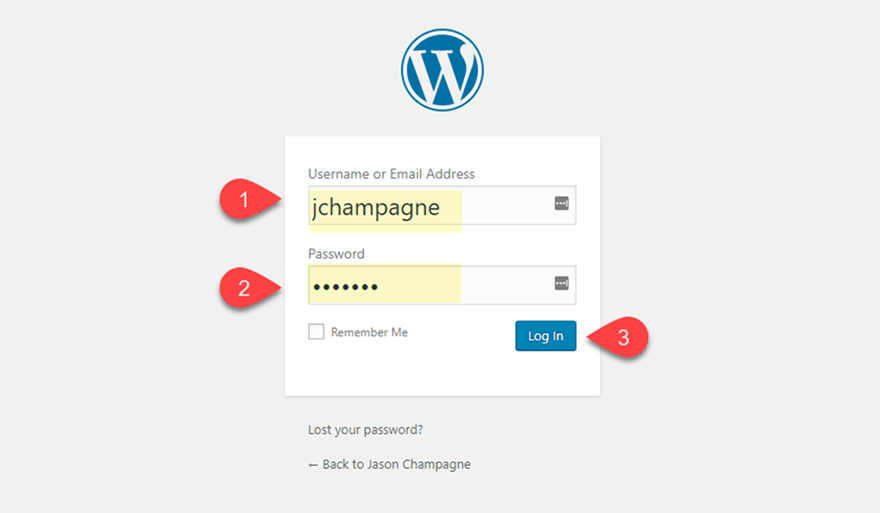
This will bring you to the login page to your WordPress website. You will want to bookmark this page for the future. It can also be accessed by going to the following URL:
www.yoursite.com/wp-login.php
Or if you don’t like that url, you can also go to www.yoursite.com/admin and it will redirect you to login as well.
To login, enter the admin username and password you created in the last step of the WordPress Installation process under “Site Information”.
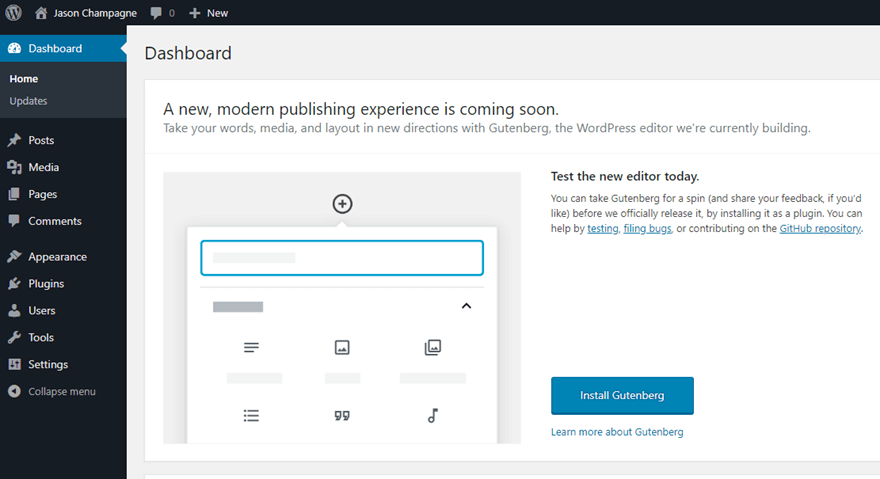
This will bring you to your WordPress Dashboard, the backend of your site.